It Takes Guts Nutrition
  • Home
    • About Me >
      • My Story
      • My Training
      • Testimonials
  • Blog
  • Healing
    • Private Consults
    • Group Programs and Workshops >
      • 7-Day Gut Reboot!
      • SmartStart
      • Guts to Heal
    • Gift Certificates
    • Access to Supplements
  • Fermenting
    • Fermented Foodies!
    • Home Visits
  • Retreats
  • Resources
    • Guides
    • Beat the Bloat NOW
    • Delicious Broth Recipes!
    • Links
  • Contact

Coco-Latte Kefir

19/2/2018

0 Comments

 
This is one of my most asked for recipes at the Fermented Foodies meetings. This deadly delicious dessert is always a hit with kids and adults alike! Makes one 500ml jar. Note: You need to start this 24-30 hours in advance!
Picture
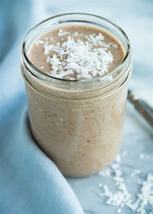
Ingredients:

1 can  Arroy-D Coconut Milk
2-4 Tbl  Live Milk Kefir Culture
1 Tbl  Cocoa powder
1-2 tsp  Fine Ground Expresso Coffee Beans (I use Midnight Sun, decaf)
1-3 Tbl  Maple Syrup (optional)

 Directions:
In a clean jar, empty one can of coconut milk and add the live milk kefir culture. Cover the jar and allow to ferment at room temperature for 24 hours. It look clumpy and taste a little sour.

Remove the milk kefir culture and set aside for your next ferment.

Add the remaining ingredients, stir or shake well.

You can consume it immediately or for best results, allow to flavor to develop by fermenting another couple hours. It tastes best cold and if you refrigerate it for a few hours, it will be more like a mousse than a drink.
0 Comments

Curtido: Spicy Sauerkraut!

23/8/2017

0 Comments

 
Picture
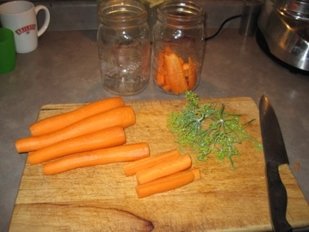
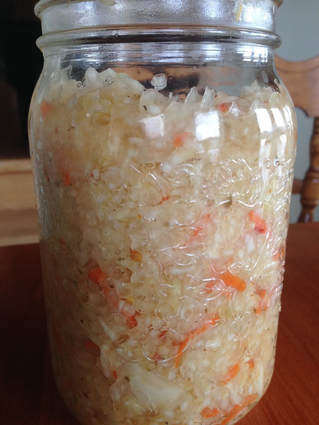
Curtido is a spicy version of sauerkraut from El Salvador... something like a pickled coleslaw or a mild kimchi.

It is quick to prepare and awesome on just about anything!

I love to eat it with rice, lentils and melted cheese; or slathered on a warm piece of buttered sourdough! (I did say I was part Ukrainian!) 

Definitely a staple in my fridge throughout the year and particularly wonderful to ferment with fresh autumn veggies.

Curtido: A Spicy Salvadorian Sauerkraut
Prep Time: 20 minutes
 
Ingredients:
  • 1 head cabbage, grated
  • 1 carrot, grated
  • ½ white onion, thinly sliced
  • 2 cloves garlic
  • 1½ T dried oregano
(1/2 T less if you don’t love oregano)
  • ¼ to ½T of chili pepper flakes
  • ¼ tsp cumin
  • 1 T sea salt
 
I use my food processor to grate the cabbage and carrot but you can use a hand grater or slice very thin.

  1. In a large bowl, combine the cabbage and carrot with the remaining ingredients (except the chili pepper)
  2. With clean hands, massage the mixture until the salt begins to draw out water from the vegetables. This is your brine and you want the mixture to be juicy.
  3. Stir in the chili peppers (we don’t want to massage the peppers with our hands!)
  4. Stuff the mixture into a crock or 1-litre jar and press down until the brine fluid comes above the veggies. Add a weight to keep the food below the brine level – I like to use a clean 125ml jar which I can fill with water for extra weight if needed.
  5. Cover and put in a warm, shaded spot to ferment ( 3-7days).
  6. Taste and check your curtido daily to ensure the veggies stay submerged in the brine. You can add clean, unchlorinated water if you need a little extra fluid.
  7. Once it is to your liking, you can eat it or store in the fridge for many weeks (if it lasts that long!)
0 Comments

Ka-POW Salsa!

9/8/2017

0 Comments

 
This salsa has a kapow that simply cannot be recreated with any other spice, herb or process. You will love its deep, zippy and brilliant flavours! This salsa always gets a lot of WOW's and smiles! Best to make with fresh tomatoes.
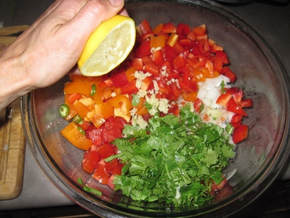
Picture
Ingredients
  • 1 medium onion, diced
  • 2 large tomatoes, diced
  • 1 medium green pepper, diced
  • 1-2 jalepeños, diced
  • Clove of garlic, minced
  • Handful of fresh cilantro
  • Lemon and lime juice to taste
  • One of the following:
   - 2 teaspoons salt
   - 1 to 2 teaspoons salt and ¼ cup whey
   - 1 to 2 teaspoons salt and ¼ cup water kefir

Instructions
  1. Mix all the ingredients together. 
  2. Place the salsa in a jar or crock,
  3. pressing down to release some liquid.
  4. Vegetables should be submerged under
  5. the liquid. Add a bit of extra water if needed.
  6. Ferment for 2+ days at room temperature.

Once the fermentation period is complete, the salsa can be removed to a storage container and stored in the refrigerator or root cellar… if it lasts that long!

Makes approximately 1 litre.
0 Comments

A Northern Kimchi

1/6/2017

0 Comments

 
There are many ways to make traditional Korean Kimchi, but I am a Yukon Girl so I like to make my own version using what is locally available (minus the ginger – if you know of any one growing/selling local ginger, please let me know!)

Kat's Yukon Kimchi
(Makes about 3 quart jars)

Picture
  • 3lbs garden cabbage, ½ grated and ½ chopped
  • 3lbs garden rutabaga/ turnip, in bite-sized cubes
  • 6 garden carrots, quartered and chopped
  • 12 Tbl of ginger, minced
  • 8-12 garden shallots, minced (or 4 white onions)
  • ½ head strong garden garlic (or 1 head store bought garlic)
  • 1-4 greenhouse hot peppers (depending on variety and hotness level you like)
  • A handful of seaweed (optional)
  • Homemade fish stock or fish sauce (optional)

  1. Make a salt water brine of 4 litres water to 8 Tbl sea salt. Stir well to dissolve the salt. You need to taste it – it should be good and salty.
  2. Prepare the vegetables and soak in the brine overnight. Place a plate or other weight on top to keep the veggies submerged. You can also add other veggies if you like.
  3.  Prepare the spices – I place mine in a food processor so it is good and pasty.
  4. Drain of the veggies, reserving some of the water. Taste the veggies. They should be quite salty, but not unpleasantly salty. If they aren’t salty enough, add some; if too salty, rinse them off.
  5. With GLOVED hands, massage the paste into the veggies – or you can just mix it together. I have done it both ways and haven’t noticed much difference between the methods.
  6. Stuff the kimchi into a 1L quart jar, pressing down until brine comes to the surface. If there isn’t enough brine, add a little from the reserve. Use a weight to keep down the veggies, like a small jam jar.
  7. Cover the jar with a tight lid, airlock lid, or paper towel secured with a rubber band.
  8. Culture at room temperature (22°C is preferred). Check and taste daily until desired flavor and texture are achieved.  Move to cold storage once it is to your liking… if it lasts that long!
0 Comments

True Pickled Dill Carrots!

27/4/2017

0 Comments

 
Picture
Here are five reasons why dill carrots are one of my favorite fermented foods.
  1. Simple, inexpensive ingredients.
  2. Short prep time.
  3. Extremely nutritious and beneficial for the gut, skin and eyes.
  4. Everyone likes them, even kids (you don't even have to tell them it's fermented!)
  5. They are crunchy and therefore snack worthy, plus they pack well.

In fact, these are so likeable that will be the first in a pilot program I've started to provide fermented foods to the Soup Kitchen.

So, without further a-do, here is a recipe for you to make Fermented Dill Carrot Sticks at home.

Prep Time: 10 minutes
 
Ingredients
  • 5-7 fresh medium carrots*, peeled, de-topped, and cut into sticks
  • 1 Tbl sea salt
  • 1 Tbl whey or kefir or brine from another vegetable ferment
  • 1 Tbl chopped fresh dill (or 1 tsp dried)
  • 3 cloves of garlic (opt)
  • Water (clean, non-chlorinated)
 
Instructions
  1. Place carrot sticks, garlic and dill in a quart (1L) mason jar. Tap down or shake the jar gently to settle the carrots if needed.
  2. Sprinkle the salt on top. (I only use about 3/4 tablespoon)
  3. Fill the jar with water to within one inch of the top of the jar. Screw on the lid and shake gently to dissolve the salt.
  4. Let the jar sit at room temperature for 4-7 days. The longer you leave them, the more sour they will become.
 
*Note: You can make this recipe with regular bagged carrots, but I find they are only half as tasty as fresh farm carrots. As a minimum, buy carrots with tops still attached.
 
THAT'S IT! Very simple. Now go on and give it a try!

0 Comments

Scon-scuits!

10/4/2017

0 Comments

 
I love Spring for so many reasons, but one of them is the increase in creativity when it comes to food!

Last week, I had a last-minute invite to supper and I had one-hour to prepare something to bring. (She'd hinted to bring something fermented!). Opening cupboards and drawers, I noticed that I still have lots of flours, sugar and several large bags of frozen cranberries in my freezer - and there was a giant bowl of fresh sourdough starter by my woodstove. So being undecided as I usually am - I started out making biscuits then decided to make scones instead.  The result was a successful hybrid that went well with dinner (a moose curry) as well as dessert (get out the honey, Mommy!) DELICIOUS!

Here is the final recipe, inspired by Miche Genest's "Sourdough Buttermilk Scones" in The Boreal Gorment. I wanted to improve their digestibility so I incorporated a sprouted flour, and ancient grain flour (spelt) and fermented milk (kefir).
Picture
Mix together:
2 cups fresh sourdough starter
1 cup milk kefir or (1/2 cup kefir with 1/2 cup milk)
1 cup fine spelt flour

Then add:
1 egg
3 Tbsp of butter, melted (coconut oil works too)

Stir in:
2 Tbsp of evaporated cane sugar
1 tsp of sea salt
2 tsp of baking powder
1 tsp of baking soda
Then you can add:
1-2 cups of sprouted spelt flour (or any other flour, but I use sprouted spelt here because the flour has not been fermented)
A couple handfuls of cranberries and crowberries.

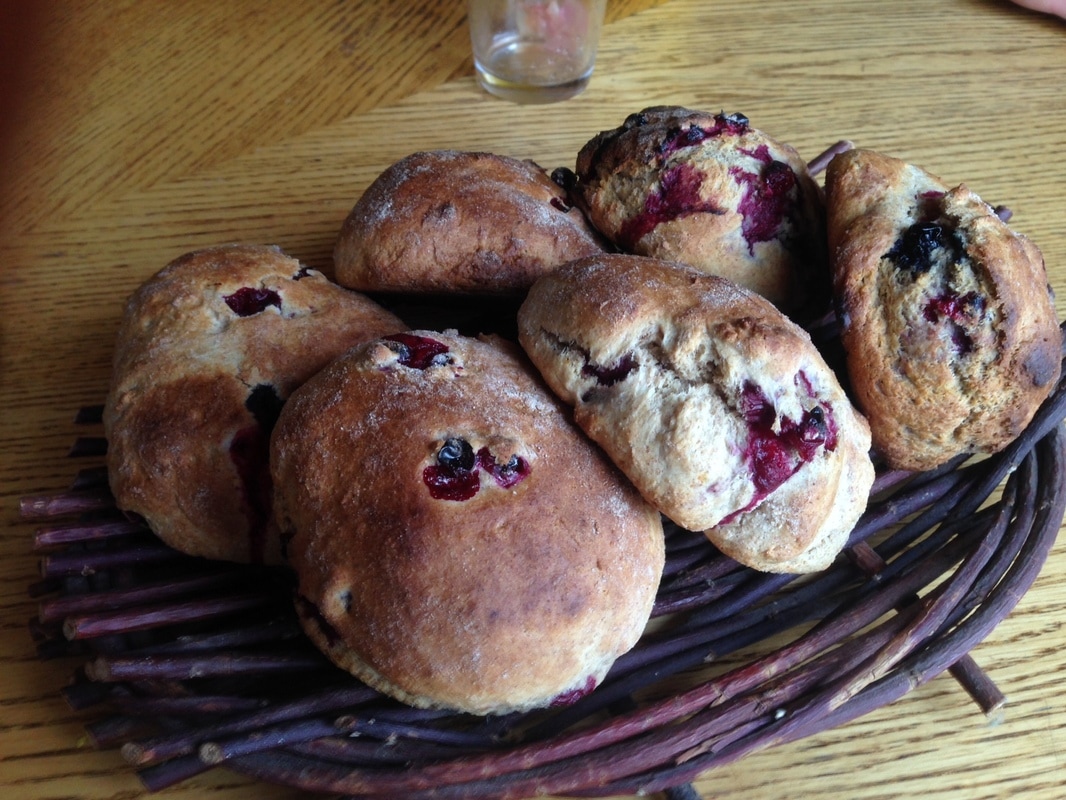
The dough will be goopy and sticky but if you put a little flour on your hands, you can pull out a handful of dough at a time and drop onto a greased parchment paper on a cookie sheet. Bake for 5-10 minutes at 425F, or until brown, then turn down the heat to 375 and bake for another 10 minutes. This recipe makes 12 large scones. Enjoy!
0 Comments

Eat Your Parsley... Or Ferment it?!

2/3/2017

0 Comments

 
Picture
I love parsley. Growing up on the timid northwest coast, my mother always had parsley in the garden, even in winter. We added it to soups and stews, and chewed it before meals as a digestive aid.  Mom was fond of telling us it was also good for bad breath and gas (she didn’t know that was because it aided digestion in the stomach).
 
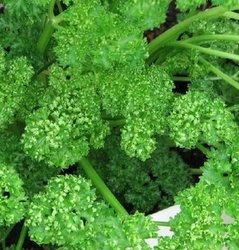
Here in the Yukon, parsley is a prolific member of my herb garden. BC (Before Children), I would re-pot my parsley in late summer and continue to grow it on my window sill during winter. Well, it didn’t really grow… it *survived* (oh, how many times the window frost engulfed the leaves). But what a blessed thing to have fresh herbs in the winter! One day, I’m going to get my indoor herb garden going again.
 
At the last Fermented Foodies gathering, I brought a new dish made with fermented parsley called Chimichirri. It’s a traditional Argentinian condiment that I also enjoyed when I lived in Paraguay. If you have ever traveled to South America, you know how fond they are of meat! Well, this condiment goes excellent with grilled meats and just so happens to aid with its digestion.  Plus, all those nutrients inherent in parsley – Vitamin C, K, A, folate and iron – are enhanced and made more bioavailable for our health.
 
I made this recipe in winter with parsley from the grocery store. I bet it will be 1000x better fresh from the garden.  Keep this recipe for summer!!

CHIMICHIRRI
  • 1.5 cups fresh packed parsley leaves, removing the main stems
  • Handful of fresh oregano leaves, or 2 Tbl dried
  • ¼ white onion, or 6 inches of leek stem
  • 4-6 cloves of garlic
  • 1 tsp chili peppers
  • 1 Tbl of aged kombucha (or apple cider vinegar, or juice of a lime)
  • ¼ to ½ tsp fresh black pepper
  • ¾ tsp sea salt
 
You can process these together in a food processer or Vitamix, or just chop very finely (it will take about 10-15 minutes though). Pour the mixture into a 2 cup/pint sized jar and press down until the brine rises above the food.  Place a weight on top to keep the mixture submerged and put the jar in a warm, shaded place to ferment for five to ten days.  Take your first taste at day five so you will know when you like it best.
 
Once the fermentation period is complete, stir in ¼ to ½ cup olive oil. Chimichurri can be refrigerated for at least a month (ours didn’t last that long). Enjoy!

0 Comments

Krazy 'Krauts!

23/11/2016

4 Comments

 
Picture

You may not know this, but I'm part Ukrainian. (Ask my high school friends if they remember my ridiculous t-shirts my Uncle gave me: "Molson Ukrainian" and the "The R.U.M.P. Service" aka. Royal Ukrainian Mounted Police). I studied folk art in Lviv, learned to dance the hopak and play the bion, and at one time, could do all of these while drinking pepper vodka!

Further to that, my mother was raised on the Prairies where cabbage was in prolific abundance. 'Nuf said!

So sauerkraut is in my blood - and I also mean this quite literally! The bacterial strains living in my grandmothers crocks would have transferred from her body, to my mother's, and to me.  I guess that means that I have a "cultural" disposition for sauerkraut. (One day soon I 'll write about how we develop our permanent residential bacteria - the the community of microbes that colonizes our guts in the first two years of our life).

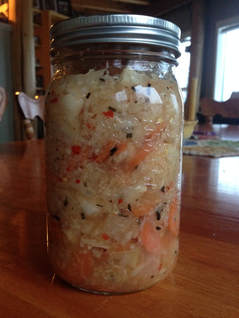
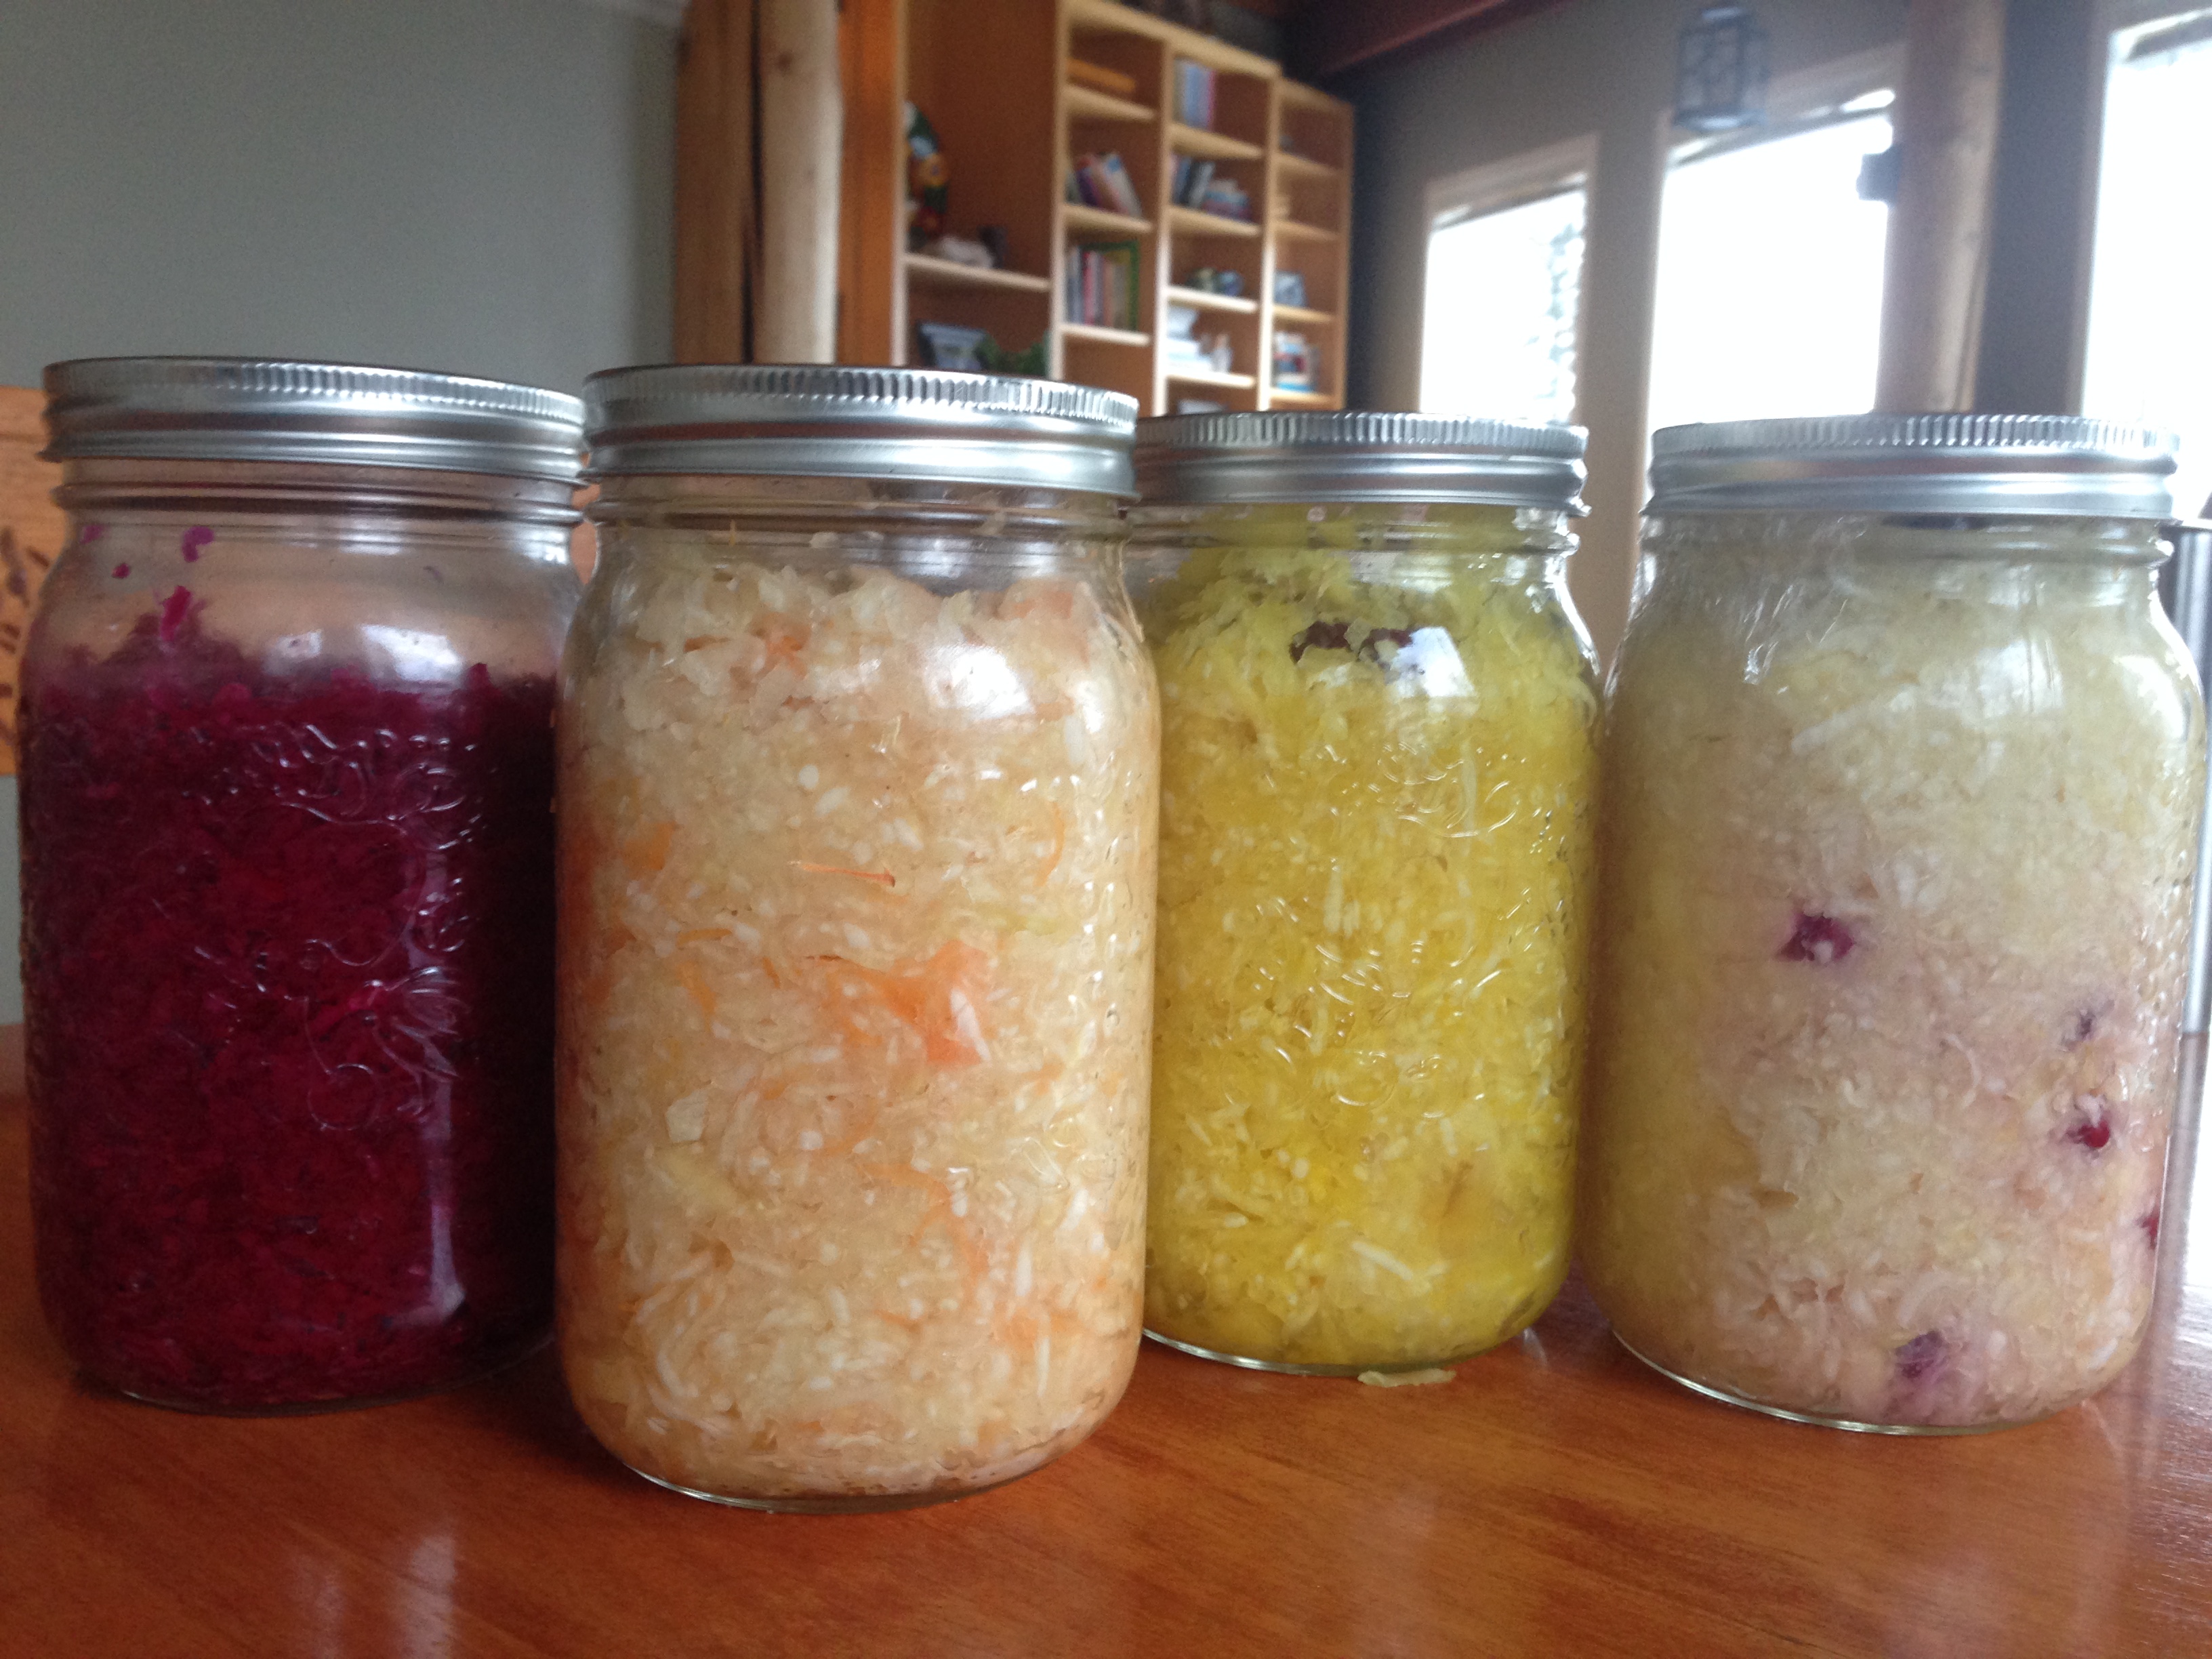
A few weeks ago, I had some German travelers stay with me. They loved my kraut but determined that it was missing some nuance. So we experimented! Thank you, Johannes and Casper, the results were truly kraut-a-licious! So, if you are bored with your basic kraut, try these!!

As pictured above, from left to right: (minus the red cabbage kraut which is simple made from purple cabbage)

YUKON GARDEN KRAUT (1L)
-1/2 head of cabbage, grated
-1 carrot, finely grated
-1 shallot, finely chopped
-1 clove garlic, minced
-4-5 juniper berries
 
GOLDEN KRAUT (1L)
- 1/2 head of cabbage, grated
- 1/2 tsp turmeric
- 2 tsp grated ginger
- 1 slice pineapple, chunks
- a small handful of apple, chopped. 
 
CRANBERRY-APPLE KRAUT (1L)
- 1/2 head of cabbage, grated
- one apple, chopped
- ½ cup Yukon cranberries
- 4-5 juniper berries.

And if you've never made sauerkraut before, here is my basic recipe:

BASIC SAUERKRAUT (Makes 1L Quart Jar)
  • 1 head of red and/or green cabbage, preferably fresh and local
  • 1-3 tablespoons sea salt 

To make a large crock, try the ratio of ¾- 1 Tbl of salt per kilogram of cabbage. 

  1. Peel off the outer layers of the cabbage and discard. Reserve one whole clean one.
  2. Chop, shred or grate cabbage (Use food processor to make this job quick). Sprinkle with salt.
  3. Knead the cabbage with clean hands, or pound with a potato masher or cabbage crusher until there is enough liquid to cover the kraut. 
  4. Stuff the cabbage into a 1L quart jar, pressing the cabbage underneath the liquid. If necessary, add a bit of water to completely cover cabbage. If you are using a weight to keep down the kraut, place the cabbage leaf on top of the kraut and your weight on top.
  5. Cover the jar with a tight lid, airlock lid, or paper towel secured with a rubber band.
  6. Culture at room temperature (20-22°C is preferred) until desired flavor and texture are achieved. If using a tight lid, burp daily to release excess pressure.
  7. Once the sauerkraut is finished, put a tight lid on the jar and move to cold storage. The sauerkraut's flavor will continue to develop as it ages.

Enjoy and don't forget to tell me how it goes for you, and what you did differently. No two fermentations are ever the same :)
4 Comments

Impressive Creamed (Kefir) Cheese

8/11/2016

0 Comments

 
I love that look - you've seen it before too - when someone tries a new food and isn't sure she is going to like it when... eyes fly open, their face cracks into a grin and we are rewarded with that burst of surprise... "Wow! YUMmmmmmm!"

Hence, I call this "Mmmmm Kefir Cheese". It never fails to disappoint! Good with crackers, bread, or raw veggies, give this a whirl.
What you'll need:
  • One liter finished milk kefir (You can try store-bought but its best make your own. If you need a local source of live cultures, click here)
  • Cheesecloth or nut bag
  • Pinch of sea salt
  • One garlic clove, crushed
  • A handful of fresh chopped dill, or 3/4 tsp dried.
Picture
Over a bowl, pour your finished kefir through a cheesecloth or nut bag. Tie up the bag so the kefir can continue to drain into the bowl for a few hours or overnight. You will be left with a clear whey liquid in the bowl (useful for starting ferments) and a creamy curdy cheese inside the cheesecloth.  Scrape the cheese into a 250ml jar, add the salt, crushed garlic and dill, and stir well. You can consume immediately but it will taste better if you refrigerate it for at least one day.

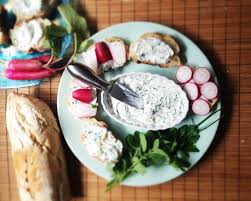
That's it! So easy its ridiculous :)  Leave me a note and tell me how it goes for you.
0 Comments
    Picture

    Author

    Hi, I'm Katanne - Nutritionist and Gut Health Specialist. My talent and passion is helping busy people like you to finally enjoy food and life again!! By resolving painful and annoying digestive issues,  we then have energy and enthusiam for our life and being the best version of ourself!
    ​As a busy, do-too-much, everyone-else-comes-first type of person, I learned the hard way that this kind of stress compromises both gut and health. It took ten years to perfect a healing approach that is less about food and more about how we live with our stress.... stress that impacts our digestion, and stress that we often bring on ourselves. We all need efficient and effective solutions that we can integrate into our busy lives, so let me find you some simple solutions to bring enjoyment back to your eating and living!

    Archives

    September 2020
    August 2020
    July 2020
    June 2020
    May 2020
    April 2020
    March 2020
    February 2020
    January 2020
    December 2019
    November 2019
    October 2019
    September 2019
    April 2019
    July 2018
    March 2018
    February 2018
    January 2018
    August 2017
    June 2017
    May 2017
    April 2017
    March 2017
    January 2017
    November 2016
    October 2016

    Categories

    All
    Recipes

    RSS Feed

Contact Me

Picture
It Takes Guts Nutrition
Katanne Belisle RHN​
Gut Health Specialist
Whitehorse, YT, CAN

What Clients Are Saying

 "I was plagued by a myriad of digestive and inflammatory issues and after months of discomfort I was fortunate enough to meet Katanne.  Her insight, intuition, knowledge and caring attention has made it possible for me to heal and thrive with a new understanding of the food I eat.  I am now healthier, happier and have more energy than I have had in quite some time. "  ~ Steve T. 
"Katanne gives well balanced information versed in first hand experience and research. After seeing various health professionals over the years, doing my own research, trials and tribulations, I can (say) that this is the real deal, and that what she provides people is a holistic, realistic approach to healing oneself through food"  ~ Elizabeth G.

​Click here for our Terms & Conditions and Privacy Policy

    Sign up for my Newsletter

    Receive informative articles and invitations to upcoming classes and retreats!
Subscribe to Newsletter
Photos used under Creative Commons from Theo Crazzolara, Stephen Pearson, shixart1985